Beginner/Essentialsのチュートリアルを見ている。
思い出しやすいように、以下に各章の内容をメモする。
Intermediate I01 – Raycasting
function Update () {

   var up = transform.TransformDirection(Vector3.up);
   var hit : RaycastHit;
   Debug.DrawRay(transform.position, -up * 10, Color.green); //(位置、方向、長さ、色)

   if(Physics.Raycast(transform.position, -up, hit, 10)){
      Debug.Log("Hit");
      if(hit.collider.gameObject.name == "floor"){
           Destroy(GetComponent(Rigidbody)); //rigidbody属性除去
      }
   }
}
Rayの描画。
長さ10のRayを物体から床に向かって出して、距離が10以内のときにアクション。
動画ではRigidbody属性を除去することで自由落下を止めている。
..敵AIに使える?主人公を見つけたら「!」
http://unity3dstudent.com/2010/08/intermediate-i01-raycasting/
Intermediate I02 – Basic Animation and Events
var blip : AudioClip;

function blipSounder () {
 AudioSource.PlayClipAtPoint(blip, transform.position);
}
床にアニメーションを付けている。マリオなどに.
ある点で音を鳴らすなどのイベントも付けられる。
http://www.unity3dstudent.com/2010/09/intermediate-i02-basic-animation-and-events/
Essentials E03 – Game view
シーンビューの見た目をメインカメラにセットするには、
メインカメラ選択後、GameObject>Ailgn With VIew
http://www.unity3dstudent.com/2010/07/essentials-e03-game-view/
Essentials E07 – Importing Assets
Assetをまとめてファイル出力する方法。
http://www.unity3dstudent.com/2010/07/essentials-e07-importing-assets/
Essentials E08 – Lights
Edit>Render Setting>環境光の調整
スポットライトでアイマスみたいなのをやってみたい
http://www.unity3dstudent.com/2010/07/essentials-e08-lights/
Essentials E09 – Cameras
メインカメラをGameObjectにセット→フォロー
子になるから、そりゃそうか!
http://www.unity3dstudent.com/2010/07/essentials-e09-cameras/
-
-
-
-
-
-
-
-
-
- -
-
-
-
-
-
-
-
-
Beginner B00 – Adding Mass / Gravity with Rigidbodies
物体に物理と跳ね返りをつける。
http://www.unity3dstudent.com/2010/07/beginner-b00-adding-mass-gravity/
Beginner B01 – Basic Collision Detection
function OnCollisionEnter(theCollision : Collision){
 if(theCollision.gameObject.name == "Floor"){
  Debug.Log("Hit the floor");
 }else if(theCollision.gameObject.name == "Wall"){
  Debug.Log("Hit the wall");
 }
}
ぶつかったObjectの名前がわかる。
http://www.unity3dstudent.com/2010/07/beginner-b01-basic-collision-detection/
Beginner B02 – Detecting Input
function Update () {
    if(Input.GetButtonUp("Jump")){
        Debug.Log("We Have Hit the Space Bar!");
    }
}
"Jump"?と思ったら調べる。Edit>Project Settings>Input
var speed = 5.0;
function Update () {
 var x = Input.GetAxis("Horizontal") * Time.deltaTime * speed;
 var z = Input.GetAxis("Vertical") * Time.deltaTime * speed;
transform.Translate(x, 0, z);
}
http://www.unity3dstudent.com/2010/07/beginner-b02-detecting-input/
Beginner B03 – Prefabs
宣言時は灰色の箱。物体を設定すると青い箱になる。
http://www.unity3dstudent.com/2010/07/beginner-b03-prefabs/
Beginner B04 – Destroying Objects
オブジェクトを消す。
function Start () {
 Destroy(gameObject);//itself
}
function Start () {
 Destroy(gameObject.Find("Box"), 3);//others //3 is Delay Time (3 seconds)
}
http://www.unity3dstudent.com/2010/07/beginner-b04-destroying-objects/
Beginner B05 – Instantiate to Create Objects
オブジェクトを生成する。
http://www.unity3dstudent.com/2010/07/beginner-b05-instantiate-to-create-objects/
Beginner B06 – Simple Timer
タイマー。
http://www.unity3dstudent.com/2010/07/beginner-b06-simple-timer/
Beginner B07 – Basic Translate Movement
var speed : float = 5.0;

function Update () {
 transform.Translate(Vector3(0,0,speed) * Time.deltaTime);
}
毎フレーム移動。
http://www.unity3dstudent.com/2010/07/beginner-b07-basic-translate-movement/
Beginner B08 – Basic Force Movement
フォースを加える。
http://www.unity3dstudent.com/2010/07/beginner-b08-basic-force-movement/
Beginner B09 – Adding Materials
Boxにテクスチャを貼る。
Create>MaterialしてからBoxにドロップしたほうが再利用性がある。
http://www.unity3dstudent.com/2010/07/beginner-b09-adding-materials/
Beginner B10 – Audio Basics
var myClip : AudioClip;

function Start () {
 audio.PlayOneShot(myClip);
}
Component>Audio>Audio Sourceを空のGameObjectに付けると鳴る。
イベントで鳴らしたいときはコードが必要。
var myClip : AudioClip;

function Start () {
 AudioSource.PlayClipAtPoint(myClip, transform.position);
}
ある点から鳴らす。
http://www.unity3dstudent.com/2010/07/beginner-b10-audio-basics/

Beginner B11 – Basic Joints
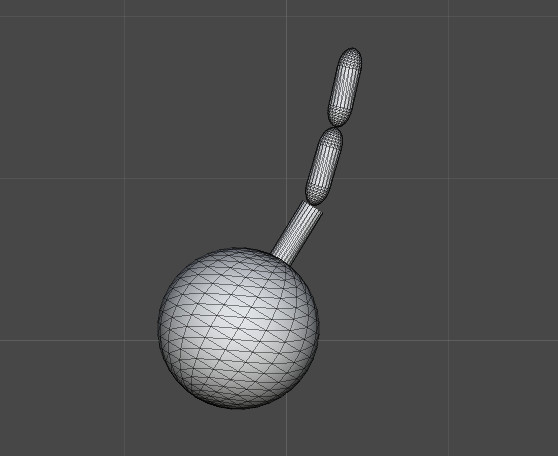
ジョイント。鎖が連結せず動いていたら、Hinge JointのConnected Bodyの指定がズレていないかチェック。
http://www.unity3dstudent.com/2010/07/beginner-b11-basic-joints/
Beginner B12 – Input with Axes
function Update () {
        var horiz : float = Input.GetAxis("Horizontal");
 transform.Translate(Vector3(horiz,0,0));
}
キーボードによるX軸方向への移動。
Horizontalの意味は、Edit>Project Settings>Inputから確認できる。
http://www.unity3dstudent.com/2010/07/beginner-b12-input-with-axes/
Beginner B13 – Trigger Collision Detection
function OnTriggerEnter (myTrigger : Collider) {
 if(myTrigger.gameObject.name == "box"){
  Debug.Log("Box went through!");
 }
}
衝突されたときの動作の書き方。
Box ColliderのIs TriggerをONにしておく(すると、いつもの衝突はせず、すり抜ける)
http://www.unity3dstudent.com/2010/07/beginner-b13-trigger-collision-detection/
Beginner B14 – GUI Text and Counters
var Counter : int = 0;

function Update () {
 Counter++;
 guiText.text = "Counter is: "+Counter;
}
テキストの位置、フォント等調整可能。
http://www.unity3dstudent.com/2010/07/beginner-b14-gui-text-and-counters/
Beginner B15 – Adding Components via Script
function OnCollisionEnter (myCollision : Collision) {
 if(myCollision.gameObject.name == "Platform"){
  if(!myCollision.gameObject.rigidbody){
   myCollision.gameObject.AddComponent(Rigidbody);
  }
 }
}
ぶつかられた瞬間にrigidbodyにする方法。(コンポネントの追加)
建物の崩壊などに使えそう。
飛行する力を失った表現とかにも。
http://www.unity3dstudent.com/2010/07/beginner-b15-adding-components-via-script/
Beginner B16 – Switching Scenes
var myLevel : String;

function OnCollisionEnter (myCollision : Collision) {
 if(myCollision.gameObject.name == "Floor"){
  Application.LoadLevel(myLevel);
 }
}
Boxが落ちたときに次のシーンに移動する方法。
File>Build Settings>使用する全てのレベルをドロップする必要がある。
http://www.unity3dstudent.com/2010/07/beginner-b16-switching-scenes/
Beginner B17 – Tweaking Components via script
function OnCollisionEnter (myCollision : Collision) {
 if(myCollision.gameObject.name == "Floor"){
  var myLight : Light = gameObject.Find("Light").GetComponent(Light);
   myLight.enabled = true;
   myLight.intensity = 5;
 }
}
Boxが落ちたときにLightを付ける方法(別のコンポネントへのアクセス)
ブロックが地面に落ちたときライトON&ライトの強さUP
→ぶつかった瞬間一気に燃えるとかできそう
http://www.unity3dstudent.com/2010/07/beginner-b17-tweaking-components-via-script/
Beginner B18 – Local vs World Direction
function Update () {
 //transform.Translate(Vector3(0,0,1) * Time.deltaTime);
 var fwd = transform.forward * 100;
 rigidbody.AddForce(fwd);
}
プリミティブで作ったペンギン。
上のコードのどちらかがワールド座標系での移動で、もう一方がローカル座標系での移動。
http://www.unity3dstudent.com/2010/07/beginner-b18-local-vs-world-direction/
Beginner B19 – Following with LookAt()
LookAt()をカメラにセットして、inspectorでターゲットをセット。
向くだけ。追いかけはしないカメラ。
(物体の移動と同じだけ動きたいなら、カメラを物体の子にすればいい)
var myTransform : Transform;
function Update () {
 transform.LookAt(myTransform);
}
http://www.unity3dstudent.com/2010/08/b19-following-with-lookat/
Beginner B20 – IF Statements and Booleans
ブーリアンに応じてテキストを書き換える。
var myCheck : boolean = true;

function Update () {

 if(myCheck){
  guiText.text = "Its on!";
 }else{
  guiText.text = "Its Off!";
 }

 if(Input.GetButtonUp("Jump") && myCheck){
  myCheck = false;
 }else if(Input.GetButtonUp("Jump") && myCheck == false){
  myCheck = true;
 }
}
http://www.unity3dstudent.com/2010/09/beginner-b20-if-statements-and-booleans/
Beginner B21 – Finding Distance with Vector3
var box : Transform;

function Update () {

 var dist : float = Vector3.Distance(box.position, transform.position);
 Debug.Log(dist);

 if(dist <= 10){
  light.enabled = true;
 }else{
  light.enabled = false;
 }
}
CubeがBallとの距離を毎フレーム計算して反応するコード。
付くのはライトなので、ライトにScriptをセットしている。
2点間距離。Vector3.Distance(v1, v2);
自分の位置は、transform.position
http://www.unity3dstudent.com/2010/09/beginner-b21-finding-distance-between-vector3-points/
Beginner B22 – Pausing Scripts with WaitForSeconds()
var box : GameObject;
var readynow : boolean = true;

function Update () {
 if(readynow){
  MakeBox();
 }
}

function MakeBox(){
 readynow=false;
 Instantiate(box, transform.position, transform.rotation);
 yield WaitForSeconds(2);
 readynow=true;
}
箱を毎フレームInstantiate()しているので箱が溢れ出す!
箱はPrefabs>weight
2秒ごとに箱を生成もしている。yield WaitForSeconds(2);
MakeBox()を毎フレーム呼び出すけれど、実は2秒ごとに実行される仕組み。
http://www.unity3dstudent.com/2010/09/beginner-b22-pausing-scripts-with-waitforseconds/
Beginner B23 – Particle Systems
var stars : ParticleEmitter;

function OnCollisionEnter (col : Collision) {
 Instantiate(stars, transform.position, transform.rotation);
 Destroy(gameObject);
}
白いパーティクルがウネウネOR飛び散る(Tangent Velocity)
オリジナルの星画像をパーティクルに設定(Particleを作ってからTexture設定)
箱が落ちたら箱が消えて星のパーティクルが1度だけ(One Shot, Auto Destruct)飛び散る。良い!カービィのボスを倒したみたい。
http://www.unity3dstudent.com/2010/10/beginner-b23-particle-systems/
Beginner B24 – For Loops
var myPrefab : Rigidbody;
var distanceMultiplier : float = 2;

function Start(){
    var i : int = 0;
    var pos : Vector3 = transform.position;

    for(i=0; i<=3; i++){
        Instantiate(myPrefab, Vector3(pos.x+i*distanceMultiplier, pos.y, pos.z), transform.rotation);
        yield WaitForSeconds(0.5);
        Debug.Log("made ball "+i);

    }
}
function Start(){}で1回だけ呼ぶ。
for()内でyield WaitForSeconds(0.5);することで徐々に箱を生成する。かわいい!
コードをセットするのは、空のGameObject?(creator object)
http://www.unity3dstudent.com/2010/10/beginner-b24-for-loops/
Beginner B25 – GUI Texture & Mouse Events
var normalTex : Texture2D;
var hoverTex : Texture2D;

function OnMouseEnter () {
 guiTexture.texture = hoverTex;
}

function OnMouseExit(){
 guiTexture.texture = normalTex;
}

function OnMouseDown(){
 Debug.Log("clicked");
}
2Dインターフェイスを作る。
http://www.unity3dstudent.com/2010/10/beginner-b25-gui-texture-and-mouse-events/
Beginner B26 – Using Mathf.Clamp to restrict values
function Update () {
 var xMove : float = Input.GetAxis("Horizontal") * Time.deltaTime * 20;
 transform.Translate(Vector3(xMove,0,0));
 transform.position.x = Mathf.Clamp(transform.position.x, -10, 10);
}
箱をキーボードで動かすが、可動域を設定。
transform.position.x = Mathf.Clamp(transform.position.x, -10, 10);
http://www.unity3dstudent.com/2010/11/beginner-b26-using-mathf-clamp-to-restrict-values/
Beginner B27 – Using Time.timeScale to Pause
var paused : boolean = false;

function Update () {
 if(Input.GetButtonUp("Jump")){
  if(!paused){
   Time.timeScale = 0;
   paused=true;
  }else{
   Time.timeScale = 1;
   paused=false;
  }
 }
}
スクリプトをセットするGameObjectは、Managerとしていた。(空のGameObject?)
スペースを押すたびにPause
http://www.unity3dstudent.com/2010/12/beginner-b27-pause-using-timescale/